
Setting Up the HyperStar System
Installing the HyperStar lens, and switching back to the standard f/10 configuration, is quick and easy. The section below describes the procedure step by step. Click here for a HyperStar Setup Quick Reference Guide to take with you into the field.
Setup Outline
-
Position Telescope
-
Attach Counterweight
-
Remove Secondary Mirror
-
Attach HyperStar Lens
-
Attach Camera
-
Connect Cables
-
Balance Telescope
-
Align Telescope Computer
Step-by-Step Instructions
Position the Telescope

Begin by pointing the telescope up at about a 45° angle. If using a German equatorial mount, simply point the telescope north with the optical tube over the mount (the normal home position). Putting the telescope in this configuration makes it easy to get to the secondary mirror and lets gravity help keep the mirror and HyperStar lens in place during installation. Tighten the mount clutches to hold the telescope in place.
Attach the Counterweight

If using a German equatorial mount, this step is not necessary. Balance can be achieved by moving the optical tube. For a fork-mounted scope, install the counterweight included with the HyperStar lens into the 1.25" visual back at the rear of the telescope. It is important to do this before installing the HyperStar to keep the weight toward the back of the telescope.
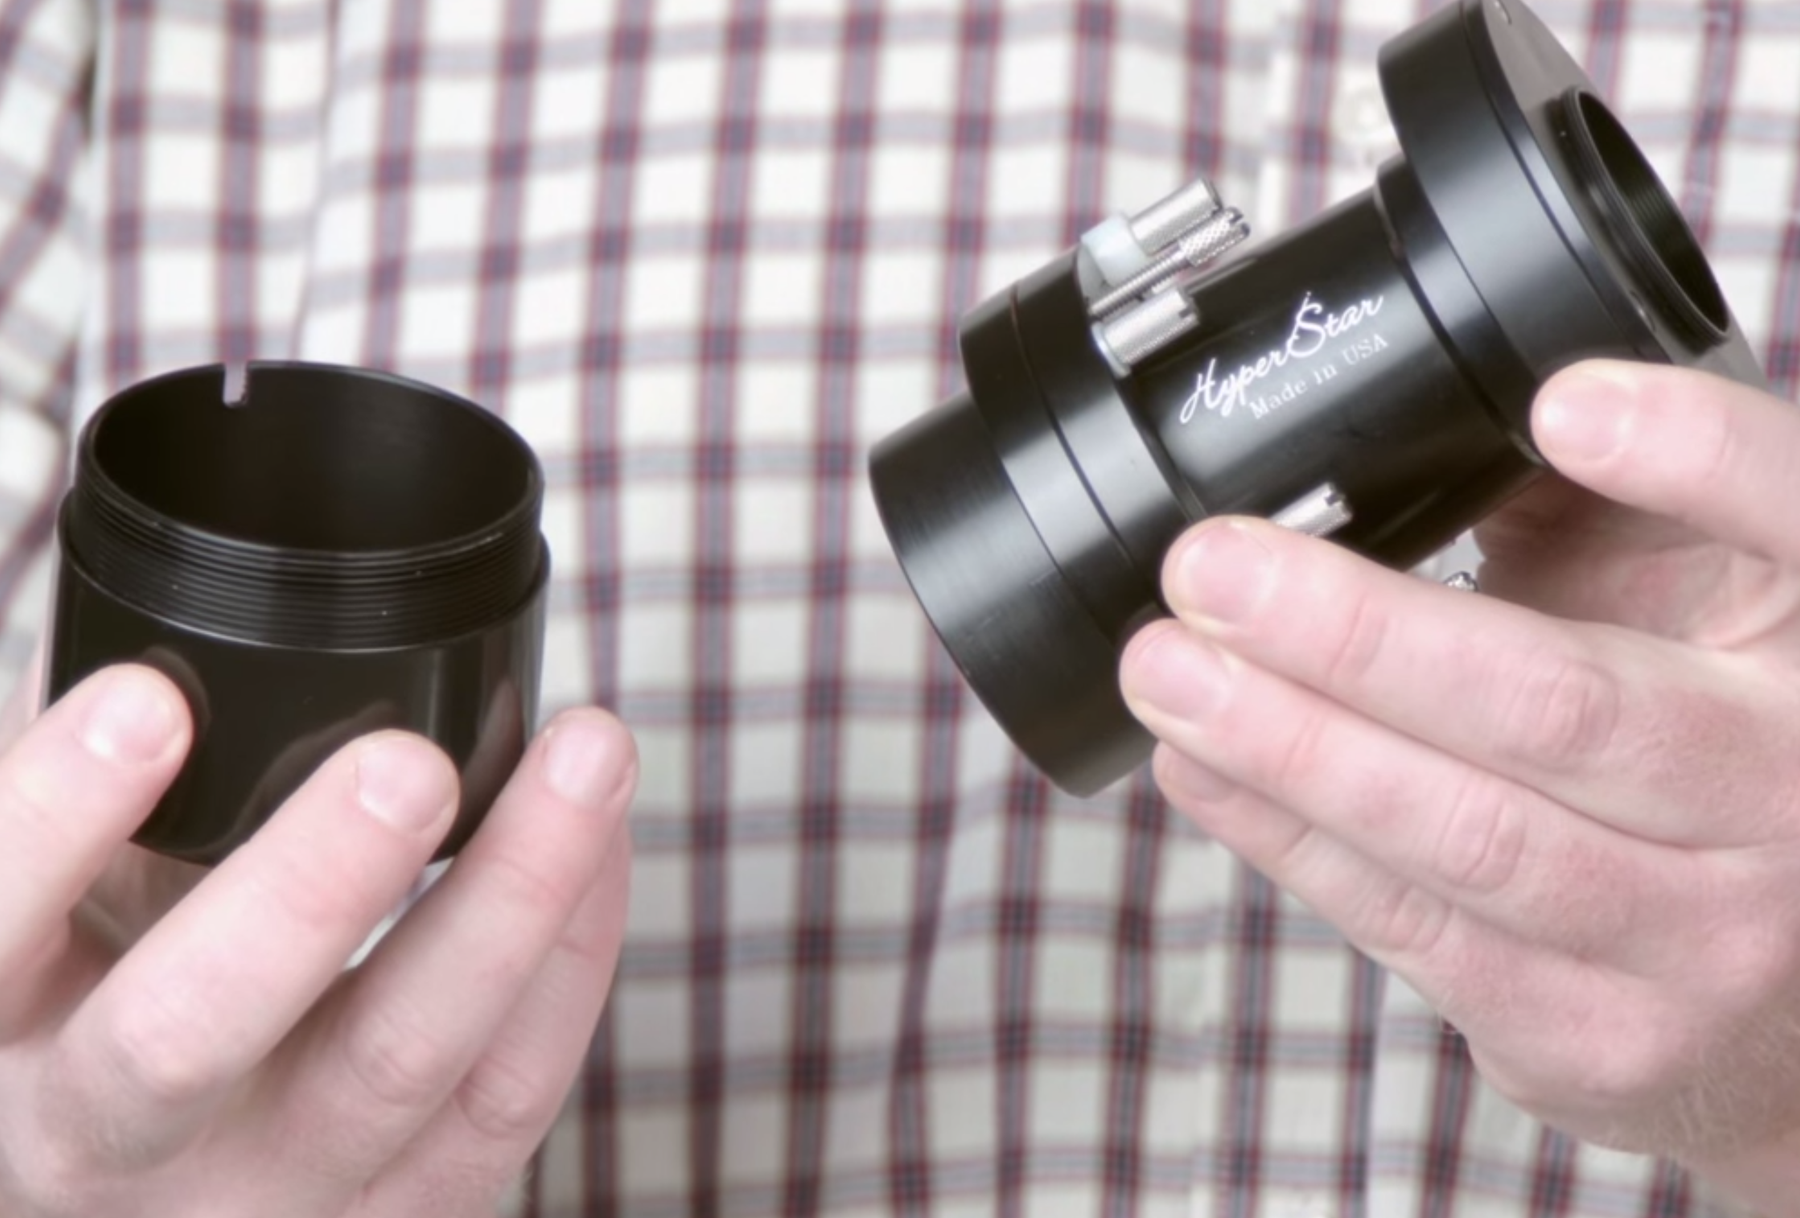
Remove the Secondary Mirror

Begin by removing the secondary mirror protective holder from the bottom of the HyperStar lens. Unthread the large retaining ring from the front of the telescope. Remove the secondary mirror assembly and carefully set into the protective holder. Note the position of the notch on the holder and align the set screw on the secondary assembly with the notch. This set screw is used to position the secondary when it is reinstalled into the telescope to keep the optics aligned and avoid the need to recollimate the telescope.
Thread the retaining ring onto the protective holder to prevent the secondary mirror from falling out.
Attach the HyperStar Lens
Thread the HyperStar lens onto the front of the telescope. Be careful not to touch the corrector plate. Also, do not overtighten the HyperStar (or the retaining ring when replacing the secondary mirror). If the temperature drops while you are observing, it could be very difficult to remove the HyperStar at the end of the night if the lens is too tight.
Attach the Camera

All CCD cameras attach to the HyperStar lens using standard T-threads. If the CCD camera has a 1.25" nosepiece, this must be removed first. Thread the camera onto the HyperStar lens. Don't worry if the orientation is incorrect at this point.
The HyperStar C14 and M14 models are compatible with digital SLRs. When using one of these cameras, attach the HyperStar to the camera using the bayonet mount just as you would attach a regular camera lens.
You can change the orientation of the camera by loosening the three thumbscrews with the white nylon washers on them. The screws only need to be loosened about 1/4 turn to allow the lens to rotate. If the screws are removed, there is nothing holding the HyperStar to the telescope anymore! Rotate the camera to the desired orientation and tighten the screws.
Connect the Camera Cables
This may seem obvious, but it is an important step because the cables must be properly tied off to keep the telescope balanced and prevent tracking errors. Connect the power and USB and any other cables to the camera, then to the computer. (Always attach power cables before plugging in or turning on power.)
Tie off the cables to prevent excess weight and drag. Be sure to leave enough slack in the cables to allow the telescope its full range of motion. On a fork-mounted telescope, tie off the cables to the handle on one of the fork arms. If using the telescope on an equatorial wedge, also tie the cables off to part of the wedge (again leaving room for the scope to move). This keeps the scope from having to lift the weight of the cables. On a German equatorial mount, you can tie off the cables to a handle on the back of the telescope--most scopes will have one--and then to a handy protrusion on the mount itself, such as a knob.
Balance the Telescope
There may not be any instruction repeated on the Guide to CCD Imaging website more than this one: Balance is the most important part of setting up a telescope for imaging. When a telescope has a tracking problem, nine times out of ten it is due to improper balance. See the webpage on Balancing a Telescope for details on the right way to balance your scope.
On a fork-mounted telescope, use the counterweight included with the HyperStar by sliding it front to back to balance the scope. On a German equatorial mount, slide the optical tube itself front to back to balance.
Align the Telescope
Once everything is set, you can align the telescope's computer. Just follow the standard alignment procedure, but use the focus mode of your camera to view the alignment stars on the computer screen. Do the rough alignment of each star using the finderscope, as you normally would, but use the computer monitor instead of the eyepiece to center the star precisely.
You are now ready to capture images on the universe! If you are using the most popular HyperStar imaging setup--a Celestron CPC series telescope, Starlight Xpress SXVF-H9C one-shot color CCD camera, and MaxIm DL software--visit this link for Step-by-Step Instructions on taking and processing images with this setup.