Image Calibration
Below are the basic steps involved in CCD image calibration. For step-by-step instructions with specific software packages, see the Software Instructions section.
Getting Started
The first thing that must be done to a raw CCD image is calibration. This is where the dark frames you took along with your images come into play. There are other forms of image calibration, but the effects are more subtle and these techniques are covered in the Advanced Image Processing section.
Note: Some software packages allow you to automatically take and subtract dark frames while you are imaging. This is definitely recommended for the beginner. However many imagers find that they want to take all the raw images they can at the beginning of the night and take the dark frames later. The advantage to this method is that dark frames can be taken if the wind starts blowing, the clouds roll in, the moon rises, morning twilight begins, or your observing companions turn on their car lights to pack up and go home! This leaves the greatest opportunity to get images while the getting is good! Also, time is saved when you only have to take one dark frame for all images of a given exposure length, instead of a dark for every single image.
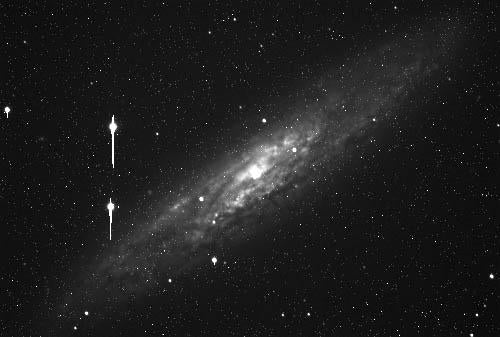
Below is an unprocessed, uncalibrated exposure of the Sculptor Galaxy, NGC253.

Notice that the image contains quite a bit of noise in the form of small white specks throughout the image. This is what we want to remove from the image. Below is a matching dark frame, taken using the same exposure time and camera temperature as the main image itself.

Select the Dark Subtract feature in your image processing software and select the appropriate image file for the dark frame. Subtract the dark frame from the raw image and voila!, you have a much prettier, less noisy image:

Note: The dark frame must be the same size as the raw image. You should not crop or perform any other processing on an image until after you have calibrated it (dark subtracted, etc).
There is still some noise left in the image. No longer bright pixels here and there, the noise is now just graininess in the dimmer parts of the image. Why not just take a longer exposure? You certainly can, but there are two limitations on just how long an exposure you can take. One factor is light pollution: a longer exposure will detect more light pollution, eventually washing out the faintest portions of the object being imaged. Even if you are imaging from a very dark location away from city lights, your exposure is limited by the tracking accuracy of your telescope and whether or not the scope is being guided. (See the Basics of Taking CCD Images section for more details.) The most common way to reduce the amount of noise is by compositing, or combining, multiple images, which is discussed in the following pages.

