Focusing
Accurate focus is critical to obtaining high-quality CCD images. One of the many advantages of CCD imaging over film astrophotography is that achieving focus is much easier with a CCD camera. However, there are still some tricks to getting a precise focus.
Note: Since this is the Basics section, the following discussion keeps focusing simple and describes the easiest and best ways to focus. For a detailed description of focusing for imaging, visit the Focus page of the Imaging Theory section. Also, see the Advanced Imaging section for more advanced methods of focusing a CCD camera. When just starting out the following methods are more than accurate enough.
First Steps
When you first set up your telescope and attach the CCD camera, odds are the telescope will be out of focus. If you last used the telescope for visual use there will be a considerable difference between the initial and final focus positions.
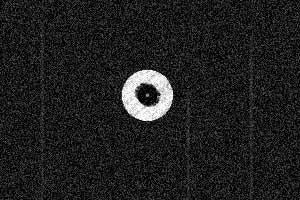
Start by getting an approximate focus visually. Use the CCD control software's focus mode (which will display continuous exposures every few seconds). Point to a naked-eye, but not-too-bright star (about magnitude 3 or 4 is good). A very short exposure (around 1 second) should show an out-of-focus star image. This image will be a large round disk in a refractor, or a donut-shaped disk in a Newtonian or Schmidt-Cassegrain.

Above: Out-of-focus star image as it would appear in a Cassegrain or Newtonian.
Rotate the focus knob to make the star smaller. If the scope is far out of focus you may have to make several full turns of the focus knob before making the star as small as possible. Don't worry about being too critical at this point. In the next step you will use the CCD control software to achieve accurate focus.

Above: Visually focused star image.
Focusing with Software
The easiest way to focus, and a very accurate method, is to use the focus mode of a CCD camera's control software. Programs display information in the focus mode about the CCD images being taken. This information can then be used to determine the position of best focus.
The most common way of showing this is with a maximum pixel value. The max value is an indication of the intensity of the light striking the CCD chip. If you are focusing on a relatively bright star, and there are no other bright stars in the field of view, the brightest pixel will correspond to the center of the star being imaged.
As you get closer to precise focus, the star image gets smaller. This means more light is concentrated in one spot, and the value of the brightest pixel will increase. This value reaches a maximum at the exact point of focus. By maximizing the brightest pixel value you can easily reach focus.
An Example

Above: A slightly out-of-focus star image gives a maximum pixel value of 5000.

Above: A better-focused image gives a higher value of 7500.

Above: Another turn of the focus knob increases the value again to 10000.

Above: Turning the focus knob slightly in the same direction lowers the pixel value to 7500. We have passed the point of exact focus. By returning the focus position giving a value of 10000 we have maximized the brightest pixel value and achieved accurate focus.
One Small Catch
The only minor difficulty is that the pixel values are never as exact as shown in the above example. Unsteady atmospheric conditions will cause the values to jump from one number to another during successive exposures. The safest bet is to watch 3 or 4 exposures between each focus adjustment and average the values. You might see values like 7456, 7527, and 7588 for the slightly out-of-focus example above, and 9921, 10023, and 10105 for the in-focus example. Patience is a virtue when it comes to focusing. A little extra time spent on this step will pay off at the end of the night!
Other Tips
-
Another factor which contributes to variations in the maximum pixel value during focus is vibrations. By selecting a good location based on the requirements stated in the Assembling the Telescope section you should be free from most ground-induced vibrations. However, you still have to touch the telescope to focus, and this act can cause a whole lotta shakin'! The use of a motorized focuser is highly recommended for CCD imaging. This device allows you to focus using a remote hand paddle which prevents vibrations from being transmitted to the telescope. Even better is an autofocuser that interfaces with the CCD imaging software to do all this work for you!
-
Refocus fairly often. Focus can change during the course of the night. As the temperature falls the metal and glass in the telescope react by changing in shape and size (this is less of a problem with telescopes constructed with carbon-fiber tubes, but is still a consideration). The change is extremely small, but is all that is required to blur your pictures. Also, most Schmidt- and Maksutov-Cassegrain telescopes employ movable primary mirrors for focusing. These mirrors are prone to slight shifts as the telescope is pointed around the sky. Spending a little extra time refocusing occasionally during the night will result in better images.
Focusing Tips
Focusing manually is something of an art. Focusing is discussed in detail in several sections of this website including the Basics of CCD Imagingand Software Instructions sections. The following section gives some helpful hints to make the process of focusing go smoother.
-
Make sure the CCD camera is in low-resolution mode to begin with. This will speed up the process by shortening the exposure time.
-
Start by visually estimating focus. Get close by making the star as small as possible.
-
Once the focus is close, switch to high-resolution mode to get a better image of the star for a more accurate focus.
-
Take 2 or 3 exposures between focus adjustments to allow any vibrations to settle out.
-
Refocus during the night since temperature changes can cause a telescope to defocus.
-
Try refocusing for each color filter if doing RGB imaging. Sometimes there is a slight difference in focus between each filter.
-
Be patient! A little extra time spent focusing will make for much better images!

