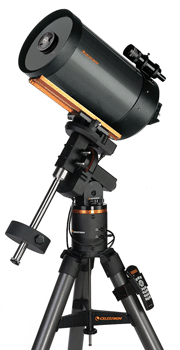
Aligning a Celestron CGE

Note: To select items from a list on the CGE hand controller, use the UP and DOWN buttons (6 and 9) on the right side of the hand controller.
First Steps
Balance the telescope. For help with this, see the Balancing a Telescope section.
Polar align the telescope mount. Use of the optional polar axis finderscope is highly recommended. For help with polar alignment, see the Polar Alignment section. Only a fairly accurate alignment is necessary as the computer system can help you get a more accurate alignment later.
Lock the clutch knobs on each axis before beginning the alignment.
Aligning the Telescope
1. Press ENTER to begin alignment
2. Press ENTER to move the telescope to its "switch position." The telescope will automatically move to a position above the mount and pointed north.
3. If you have the optional GPS accessory, allow it a few minutes to link, then skip to step 14.
4. If you do not have the optional GPS accessory, press UNDO to edit the site information
5. Enter the current time, press ENTER. You can enter time in 12-hour or 24-hour format.
6. Select AM/PM if necessary, press ENTER
7. Select Daylight Savings/Standard Time, press ENTER
8. Select Time Zone, press ENTER
9. Enter Date, press ENTER
10. Enter Longitude, press ENTER
11. Select East/West, press ENTER (U.S. longitudes are West)
12. Enter Latitude, press ENTER
13. Select North/South, press ENTER (U.S. latitudes are North)
14. Select Auto Two-Star Align, press ENTER
15. Press ENTER to select the first alignment star
The hand controller will indicate that the telescope is slewing to the first star (for example, Vega). Wait for the telescope to finish moving and display the next screen.
16. The telescope will now be pointed near a bright star. Use the arrow keys on the hand controller to center the star in finderscope, pressENTER
17. Use the arrow keys to center the star in the eyepiece, press ALIGN
The hand controller will indicate that the telescope is slewing to the second star (for example, Antares). Wait for the telescope to finish moving and display the next screen.
18. The telescope will now be pointed near a bright star. Use the arrow keys on the hand controller to center the star in finderscope, pressENTER
19. Use the arrow keys to center the star in the eyepiece, press ALIGN
The hand controller will read "Align Successful" then "CGE Ready." The telescope is now aligned.
Refining the Polar Alignment
At this point, the telescope is aligned fairly accurately, but if the polar alignment is off, the pointing accuracy will be affected. You can use the hand controller to refine the polar alignment using the following steps.
1. Press MENU
2. Select Utilities and press ENTER
3. Select Polar Align and press ENTER
The telescope will point to where Polaris should be. If the polar alignment is off, Polaris will not be in the eyepiece.
4. Use the left-right and up-down adjustments on the mount, NOT the hand controller, to move the mount and center Polaris in the eyepiece. Use the included hex-head wrench to adjust the mount.
5. Press ENTER
6. Repeat the Auto Two-Star Alignment procedure from above. The time/date/location will be correct if you have not powered off the telescope. Press ENTER instead of UNDO when the site is displayed.
The mount is now polar aligned. If necessary, this procedure can be repeated until a very accurate alignment is achieved.
Calibrating the Mount
For the best accuracy, you can perform a Cone Alignment procedure on the CGE mount. This compensates for any misalignment between the mount axes and the telescope's optical axis. This procedure should only need to be done once.
Before calibrating, you must perform an Auto Two-Star Alignment as described above, using two stars in the same half of the sky (east or west).
1. After a successful Auto Two-Star Alignment, press LIST
2. Select Named Stars, press ENTER
3. Select a star on the opposite side of the sky from your initial alignment stars, press ENTER
The telescope will now point toward the chosen star. Wait for the telescope to finish moving before continuing.
4. Press MENU
5. Select Utilities, press ENTER
6. Select Calibrate Mount, press ENTER
7. Select DEC Switch/Cone, press ENTER
8. When prompted, center the star in the eyepiece using the arrow keys on the hand controller
9. Press ENTER
The calibration is now complete and should not need to be done again unless the mount is used with a different optical tube.
Selecting Objects from the Catalog
To select a deep-sky object, press either the Messier (1), Caldwell (2), or NGC (4) button on the hand controller to choose the desired catalog. Enter the number of the object in the catalog. Messier and Caldwell objects require 3 digits, NGC objects require 4 digits. To select M13, for example, you must enter 013; for NGC253, you must enter 0253.
Press ENTER and the telescope will slew to the selected object. Press UNDO to select a new object.
To select a solar system object, press PLANET (5). Use the UP (6) and DOWN (9) buttons to scroll through the list of available planets (the telescope will only list those planets above the horizon).
Press ENTER and the telescope will slew to the selected planet. Press UNDO to select a new object.
To select a double star, variable star, or other type of object, press LIST (8). Use the UP (6) and DOWN (9) buttons to scroll through the list of catalogs. Press ENTER to select a Catalog. Use the UP and DOWN buttons to scroll through the list within a catalog.
Press ENTER and the telescope will slew to the selected object. Press UNDO to select a new object. Press UNDO again to return to the main menu.

