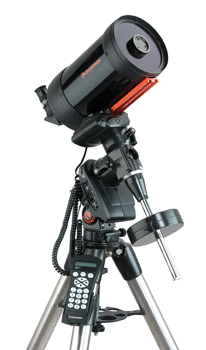
Aligning a Celestron Advanced Series GT

Note: To select items from a list on the Advanced Series GT hand controller, use the UP and DOWN buttons (6 and 9) on the right side of the hand controller.
First Steps
Balance the telescope. For help with this, see the Balancing a Telescope section.
Polar align the telescope mount. Only a fairly accurate alignment should be necessary. For help with this, see the Polar Alignment section.
Lock the clutch lever on each axis before beginning the alignment.
Aligning the Telescope
1. If you have the optional GPS Accessory on your telescope, press ALIGN, allow the GPS a few minutes to link, then skip to step 14.
2. If you do not have the optional GPS Accessory, press ENTER to begin alignment
3. Select AUTO ALIGN
4. Press UNDO to edit the time/date/location information
5. Enter the current time, press ENTER. You can enter time in 12-hour or 24-hour format.
6. Select AM/PM if necessary, press ENTER
7. Select Daylight Savings/Standard Time, press ENTER
8. Select Time Zone, press ENTER
9. Enter Date, press ENTER
10. Enter Longitude, press ENTER
11. Select East/West, press ENTER (U.S. longitudes are West)
12. Enter Latitude, press ENTER
13. Select North/South, press ENTER (U.S. latitudes are North)
14. Set North and Index marks. Use the arrow keys on the hand control to align the index marks on each axis of the telescope. The telescope should end up above the mount and pointed north.
The hand controller will indicate that the telescope is slewing to the first star (for example, Vega). Wait for the telescope to finish moving and display the next screen.
15. The telescope will now be pointed near a bright star. Use the arrow keys on the hand controller to center the star in finderscope, pressENTER
16. Use the arrow keys to center the star in the eyepiece, press ALIGN
The hand controller will indicate that the telescope is slewing to the second star (for example, Antares). Wait for the telescope to finish moving and display the next screen.
17. The telescope will now be pointed near a bright star. Use the arrow keys on the hand controller to center the star in finderscope, pressENTER
18. Use the arrow keys to center the star in the eyepiece, press ALIGN
Hand controller will read "Align Success, Turn StarPointer Off". If you have a red-dot type finder, be sure to turn it off at this point. The telescope is now aligned.
Selecting Objects from the Catalog
To select a deep-sky object, press either the Messier (1), Caldwell (2), or NGC (4) button on the hand controller to choose the desired catalog. Enter the number of the object in the catalog. Messier and Caldwell objects require 3 digits, NGC objects require 4 digits. To select M13, for example, you must enter 013; for NGC253, you must enter 0253.
Press ENTER and the telescope will slew to the selected object. Press UNDO to select a new object.
To select a solar system object, press PLANET (5). Use the UP (6) and DOWN (9) buttons to scroll through the list of available planets (the telescope will only list those planets above the horizon).
Press ENTER and the telescope will slew to the selected planet. Press UNDO to select a new object.
To select a double star, variable star, or other type of object, press LIST (8). Use the UP (6) and DOWN (9) buttons to scroll through the list of catalogs. Press ENTER to select a Catalog. Use the UP and DOWN buttons to scroll through the list within a catalog.
Press ENTER and the telescope will slew to the selected object. Press UNDO to select a new object. Press UNDO again to return to the main menu.

